Though the default wireless security is good enough, we can add more security to your JioFi network by activating MAC Address Filter.
In this tutorial, you will learn how to enable MAC Address Filter on a JioFi Wireless portable router.
To enable MAC Address Filter, you must connect your computer to the JioFi device. Though the below steps works in a wireless connection, I recommend you to connect Jio 4G router to PC using a USB cable.
Steps to Enable MAC Address Filter On a JioFi Device
- Switch on Both Computer and JioFi router.
- Type http://jiofi.local.html/ on the address bar of a browser and press enter button.
- Click on the login button at the right-hand top of the window.
- Enter the current username and password to log in.
Default Username: administrator
Default Password: administrator - Click on Settings and click on Network tab.

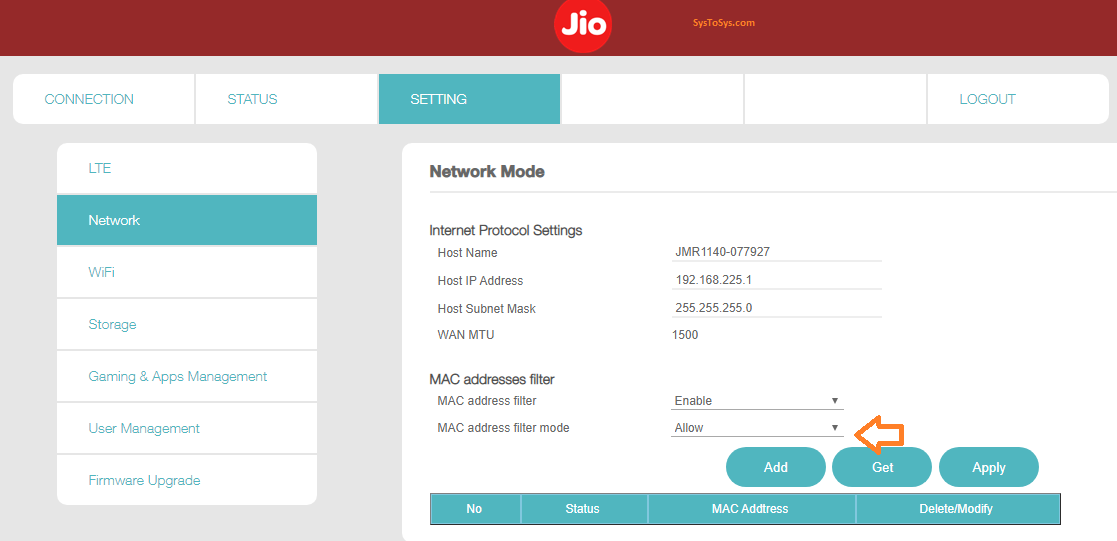
To enable the MAC Address filter, click on the drop-down button near the MAC address filter. Select the Enable option and click on the Apply button. - Your JioFi router will reboot, and you need to log in again.

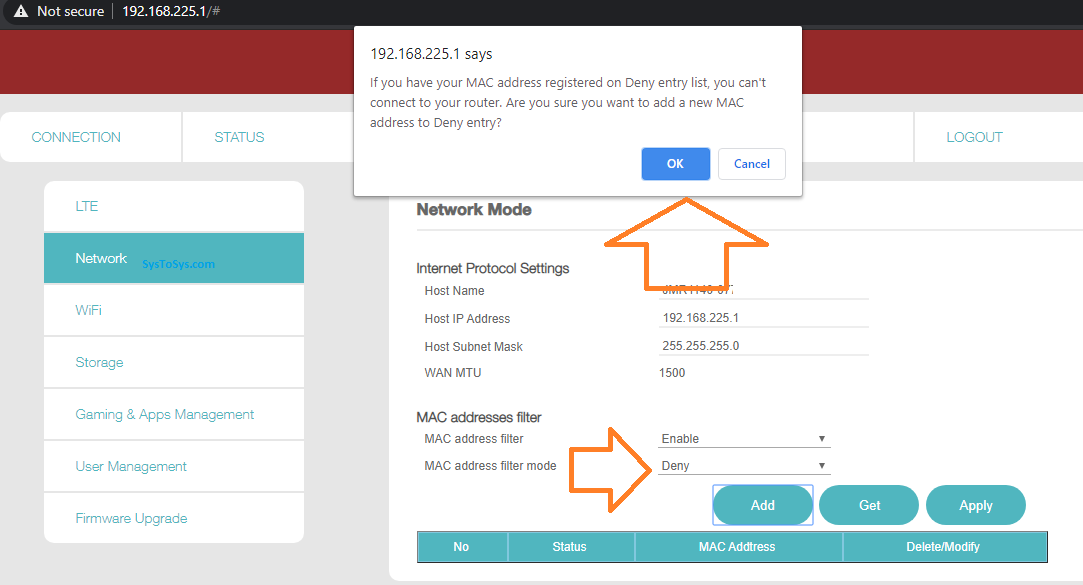
- Once you sign in back, you will see one more option in the same window. You can choose the MAC Address Filter Mode by clicking the drop-down menu.

Here you can choose either the Allow mode or the deny mode. Let me show you how to use this MAC Address Filter Mode to either allow or deny a MAC address from connecting to the JioFi network.


