Find Wireless Network Password With Windows 11 Command Prompt
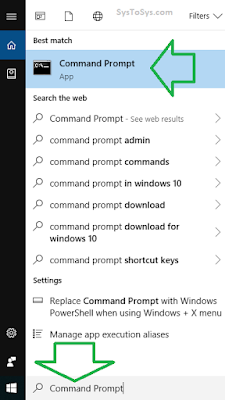
- Open Windows 11 Search (by pressing the Windows and S keys together, then type Command Prompt on Windows Search.

Click on it to start it.
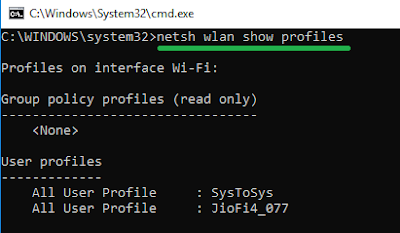
- Type the command netsh wlan show profiles and press the Enter key.

You can see the two WiFi profiles saved on this PC.
- We can find the WiFi security key of these two wireless profiles using the Command Line below.
Code: Select all
[i]netsh wlan show profile name="XXXX" key=clear[/i]
Code: Select all
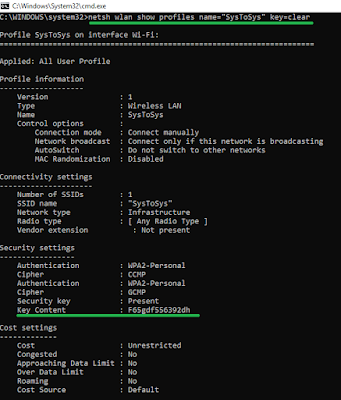
For example - netsh wlan show profile name="SysToSys" key=clear
- Running the command, netsh wlan show profile name="SysToSys" key=clear will show you the following screen.

To view the WiFi key of the selected wireless profile, look at the Key Content. It is below the Security Settings.
It is the safest and simplest method to find the Network Key of a WiFi network you have used on your Windows 10 computer. The above example explained the steps to find the network key of a WiFi connection named SysToSys.
By using the simple Command
netsh wlan show profile name="SysToSys" key=clear, Command Prompt revealed the Security key.
Under Security Settings, we can see the Authentication type and the Security key.
This method is entirely helpful to retrieve the forgotten WiFi passphrases of the connections you had connected before.
For example, if you are curious to know the WiFi key of a hotel you had stayed in or your office network, you can use this trick. But you cannot use this trick to find the wireless key of a new WiFi network that you have not used yet.
PS: You cannot use this trick to find the Wireless Password of your neighbor.
However, this method is useful to find the security passphrase of your own connections if you forgot them.
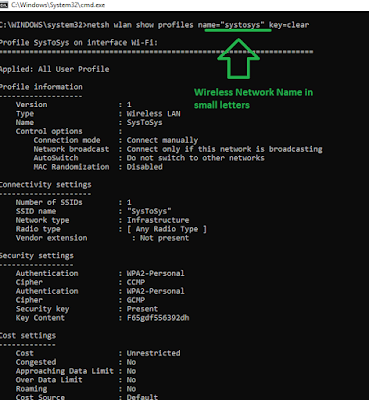
Note: One reader asked me whether the command is case sensitive. In my experience, DOS Prompt does not case whether we type the command in capital letters or small letters.
To prove it, I have added the screenshot of the result of the command.

If you check the screenshot, you can see the SSID - systosys instead of SysToSys. The result is the same in both cases.


